
Not sure if other Property Stylists can relate to this, but we get this all the time:
“Oh my gosh, you work for a Home-Staging company, that must be such a fun and easy job!”
Fun – yes! 100%! It is a lot of fun and we love the creative aspect of it, BUT… it is by no means easy.
Most people don’t get to see the volume of work going on behind the scenes and just how much thinking, strategic planning and scheduling needs to happen to make their homes ready for a successful sale.
Home Staging is not just about making a house look pretty, that would be easy. It’s about making it marketable.
That means we have to take into account a whole range of different factors, like the demographic of the buyers, agent’s preferences or even the expected Return On Investment for the client (ROI), to name a few. All this is considered way before we even pick the first vase off the shelf.
Just before we lift the curtain on our backstage process, there is one thing that Phoebe (our Chief Stylist) kept emphasizing the importance of.
Communication is key.
As our bus(y)iness grows and team expands, keeping everyone on the same page and up to date has significantly increased on importance. That is why we’ve developed and implemented easy-to-use communication methods, ensuring everyone knows what’s going on.
Aside from the three online programs mentioned in the article above, our Stylists also stay in touch throughout the day – with phone calls, messages on notice boards and weekly meetings.
Our Process from Consult to Install
We have summarised the entire procedure into nine steps, but in this article, we will focus more specifically on the Selection Process (steps 4 -7). The order of these varies per Stylist, as each one has their own preferences. (For example, Cassie likes to start with accessories, Caitlin chooses her artwork last, etc.).

1. CONSULTATION
One of our Lead Stylists will meet the client at their house and ask them a few questions to get a better understanding of their situation, and to determine what kind of staging would be the most beneficial option for them.
Foxy Stylist checklist:
![]() Meet the client, establish a relationship, give recommendations & tips
Meet the client, establish a relationship, give recommendations & tips
![]() Take lots of photos (cover different angles, colour of walls & carpets, nooks…)
Take lots of photos (cover different angles, colour of walls & carpets, nooks…)
![]() Upload photos to Google Drive
Upload photos to Google Drive
2. QUOTE
Within 24 hours of the consultation, Phoebe emails the client a quote outlining all the details, incl. a list of furniture items, instructions, and pricing options. We aim to be as transparent as possible to ensure the clients know exactly what they’re paying for.
If you are a Home-Staging Business Owner, you can download our Quoting Tool here, completely for FREE! We’ve made it available with the intention help others in the industry, hope it’s of value!
3. CONFIRMATION OF THE INSTALL DATE
This is the part of the process where Jake (our ‘Numbers Guy’) usually takes over, overseeing the invoicing and paperwork process.
Once that is sorted, we suggest booking the installation on the same date as photography, that way everything looks perfect, and the beds are freshly steamed.
4. FURNITURE SELECTION
Choosing the most suitable furniture items is probably the most important part of the selection process, as the furniture dictates the size and style of the accessories.
(Although we prefer to select the furniture first and decorations second, in reality these do not always happen in tandem. If that’s the case, we have to go back and review the accessories we’ve already chosen to ensure they match the furniture.)
Because there are so many different factors to consider, this responsibility usually falls into the hands of our Senior Stylists. Their objective is to select furniture that emphasizes the features of the home, suits the architectural style of the house, matches the client’s budget, and appeals to the target audience.
On top of that, they must also take into account the Real Estate Agent who has booked the styling job, ensuring the style of furniture we pick looks different to all the previous jobs we’ve done for them. Doing this adds a differentiating element to their listings, which is often appreciated by the Agents.

The Furniture Selection Process:
![]() Jake sends an updated Inventory List* to the Lead Stylists so they know what furniture is available
Jake sends an updated Inventory List* to the Lead Stylists so they know what furniture is available
![]() The Stylists make their selection and write down a list
The Stylists make their selection and write down a list
![]() This list gets placed into a folder with the corresponding day of the install (pictured)
This list gets placed into a folder with the corresponding day of the install (pictured)
![]() The Stylists then attach a coloured sticker on each furniture item, adding one of the stickers on the list as well, so the removalists know what colour to look out for during loading
The Stylists then attach a coloured sticker on each furniture item, adding one of the stickers on the list as well, so the removalists know what colour to look out for during loading

*Download a free copy of our Inventory Management Excel Spreadsheet here.
5. ARTWORK SELECTION
Referring back to the photos we took during the consult and the property’s floorplan (obtained from the client or from RP Data), there are three main things we keep in mind during our art selection.
- Positioning – Home Staging is all about creating the best first impressions. The role artwork plays in this is being the Focal Point of the room, guiding the gaze and influencing the first opinions buyers form when they walk in.
- Size – The art we choose needs to be the right fit for the size of the wall and size of the furniture.
- Colour – Influenced by the colour palette of each room, the end goal is to select artwork that ties the furniture in with the colour of the walls and decorations.
—
Watch Phoebe explain our artwork selection in more detail.
Once the artwork has been selected, the Stylists place it into the corresponding Bay together with linen bags, large plants, floor lamps and any other bulky items that need to be loaded on the truck.
Anything small get packed into buckets and the Stylists transport them in their cars to prevent any breakage.

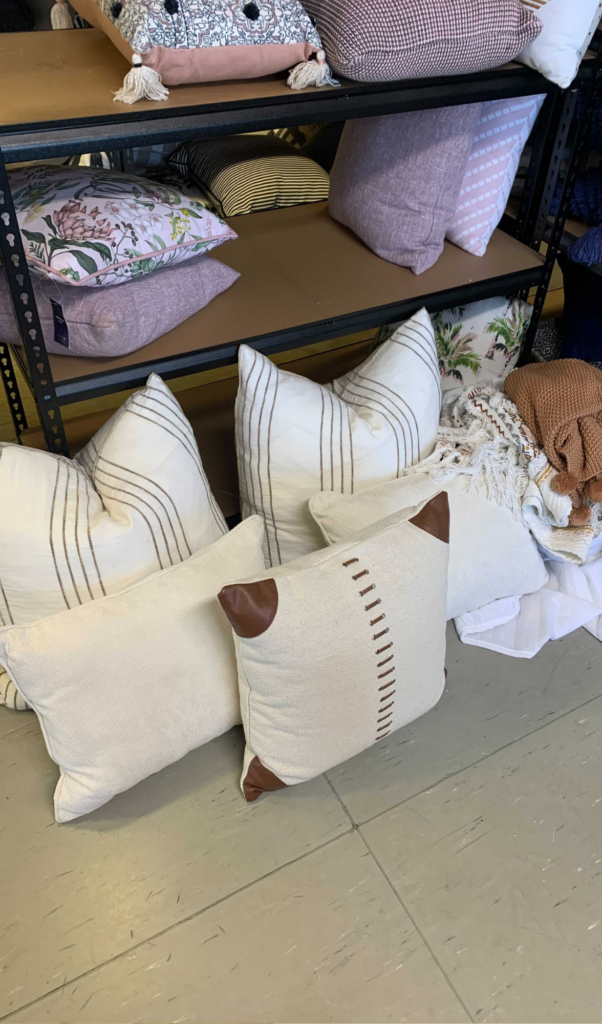
6. CUSHIONS & BED LINEN SELECTION
Similar to the artwork selection mentioned above, there are three main keys that apply to choosing the best cushions.
- Colour-match the cushions with the room & style.
- Choose the right number of cushions. We usually do 5 cushions in master bedroom, 3 on double bed, 2 on single bed, 3 cushions on a 2.5-seater sofa, 5 cushions on a 3-seater, 7 cushions on a modular/chaise.
- Don’t forget to include throw rugs.
Read ‘7 Ways to Style a Throw Rug’.

When it comes to cushions in the living areas (sofas, lounge chairs, etc.), we always stick with the same colour palette, to keep a nice flow throughout the entire home. When it comes to styling bedrooms, we can be a bit more adventurous and choose a completely different colour theme per bedroom.
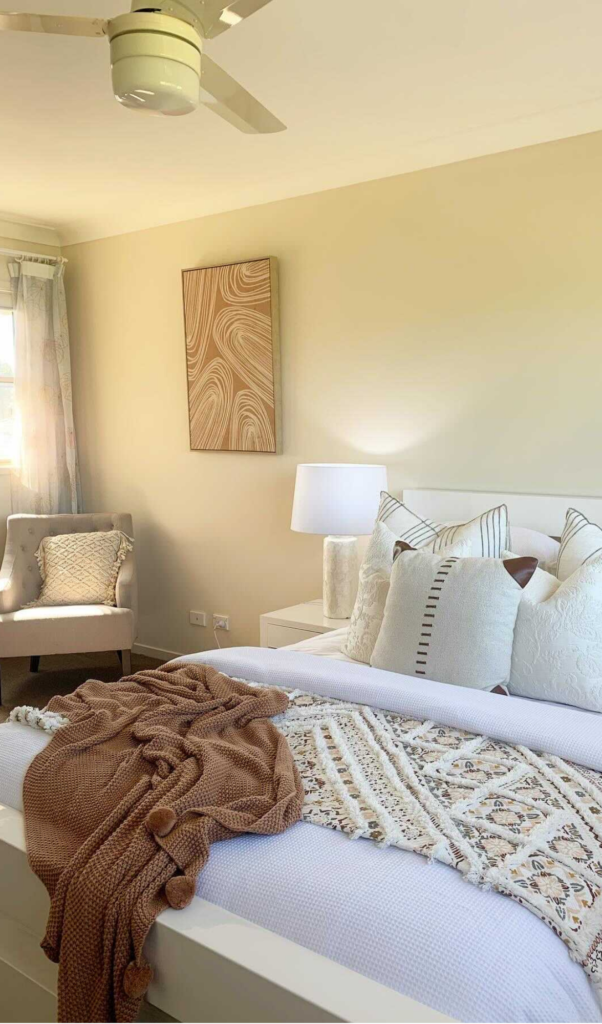
How it all comes together:
Picture 1: Our Stylists mix & match the cushions in the warehouse.
Picture 2: What it looks like in the property.
7. ACCESSORIES SELECTION
All our Stylists agree that selecting decorations is their favourite part of the entire process. And it’s no surprise, considering the wide range of accessories they have at hand! This is when they can truly unleash their creativity and pick and choose whichever décor items they want.
Although there are a lot of Styling Rules, we like to see them more as ‘guidelines’, trusting that our Stylists will always choose what is best for the presentation of the property.
It all happens in the Styling Room, where the large tables get used as temporary stands for decorations, section by section. This way the Stylists get to see how it all looks together and they oftentimes talk among themselves and brainstorm ideas.

Watch this FoxyTV episode where Phoebe delves into more detail about how to select the right accessories.
8. TRANSPORT
On the day of the install, our Removalists take the stickered furniture off the shelves and load it in their truck, highlighting each individual item on the furniture list as it’s being loaded. Once the furniture has been securely strapped to the walls of the truck, they take the linen bags and artwork from the Bay.
Meanwhile, our Stylists place all their accessories into buckets and load them in their cars.
9. PROPERTY INSTALL
And this is where the magic happens!
To the ‘outsider’, this process may appear totally chaotic, but trust us – everyone knows exactly what they’re doing. One of the Stylists usually gives the boys a quick run-down at the beginning of the install, letting them know where to place each furniture item.
Depending on the size of the house and access to the property, this process takes approximately 1-2 hours.
Occasionally, some furniture items get rejected if the Stylist feels like they are ‘too much’ for the space. In that case the item gets taken off the stock list, making it the “Final Version” that gets uploaded to Trello. This version is then used again at the time of pack-up.


Facebook Comments